Monday, February 18, 2013

DIY: The Crazy Art Teacher

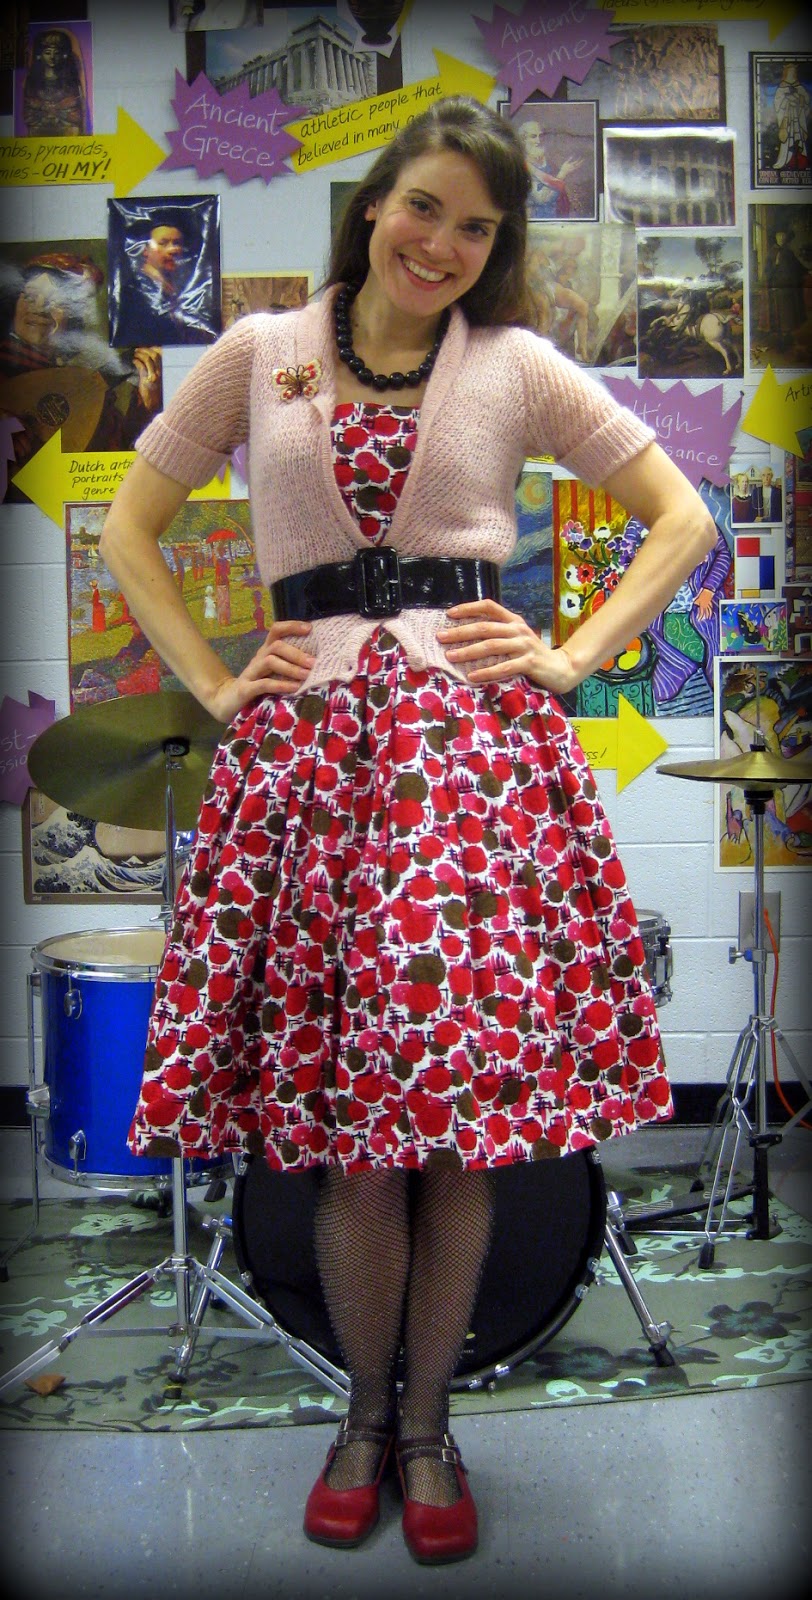
Gah, all too often I see these photos of myself and have Senior Class Photo Flashbacks. Hand on hip? Check. Smirky "I'm about to Take on the World" face? Check. Unfortunate hat choice? Hey! I'm a crazy art teacher, I'm entitled to a fashion faux pas! (okay, check).
 Yeah, yeah, I know. I've finally done it: I've crossed the threshold from quirky art teacher to full blown jean-jumper, thematic-sweater-vest, Keds-and-ankle-socks madness. You saw the warning signs what with the Painted Jean Dress, the Pencil and Notepad Skirt, not to mention the Pencil Shoes! But did you do anything about it? Did you step in, pull me aside, gently attempt to remove the rainbow hat from my head? Um, no. You didn't. So who's to blame here, people? I mean, really. I'd hold up a mirror but I don't think you'd be able to see it.
Although if we're really gonna point fingers, I gotta blame the librarians of the world and their Read Across America Week (hey, art teachers, we need an Art Across America Week! Let's start one, 'kay?). If you're not familiar, it's this week long thingie that involves reading (um, duh) and, for some reason, dressing silly. Crazy Hat Day just so happens to be one of those days.

Now the aforementioned Rainbow Hat I wore last year is a tough one to top but after sharing this Christian Dior palette hat last week, I got to thinkin': I can make this hat! Kinda!
I just so happened to have this hole-y (not to be confused with holy) beret in my stash of wacky hats that the kids wear when they pose for each other during impromptu drawing sessions (along with a sombrero, a knight's helmet and an ship captains hat. Ah, the treasures of a hoarder). I thought the creme color would make for the perfect background for my paint palette.
This was probably the easiest and fastest DIY to date. I just laid out wads of felt roving and proceeded to punch away. If you'd like more details on the whole felting process, you can read about my first venture into felting-land here. And then there's the felted Put a Bird on It sweater and an Anthropologie-inspired felted sweater here. I tol' you, I'm addicted. It's the whole stabbing and punching thing that I love. What?
Because I was stuck with the circular shape of the beret, I decided to "draw" the shape of the palette in black roving (not to mistaken for Cher's hair). You can see I drew all over my beret and then followed my line.
Have you seen this movie? Or, more accurately, have you ever seen such a beautiful woman? I can hardly focus on the plot because Faye Dunaway's gorgeousness just prevents it. Such a stunner.
As I was punching away on the finishing touches of my beret, it reminded me of Faye Dunaway's portrayal of Bonnie Parker. You know, that whole beret-wearing vintage look. And, since you weren't around to stop me, it was then I decided I needed an entire Bonnie and Clyde/Crazy Art Teacher outfit. 
"Hey! Bonnie! Over here! What do you think!? Can I join the Barrow Gang now or what? ...hello? Maybe I'll just come back when you're not holding a gun, ermkay?"

I started with this too-long/too-boring tweed skirt that'd been in my closet since...I dunno, my first year teaching? Which was like 15 years ago or something ridiculous like that. And that ain't nuthin cuz I still have my high school prom dresses and my first mail-order clothing purchase from ninth grade. I like to think of my closet as being akin to Hotel California. Clothing, you can check-out any time you like, but you can never leave! (P.S. I've not forgotten my promised closet tour post...it's coming).

After sketching out my tweedy art teacher skirt, I zipped over to the local craft place for sheets of colorful felt at $.34 a piece. After cutting them out, I used an applique stitch to add the "paper" to the crayon as well as those black designs that makes a Crayola crayon recognizable from it's lamer, waxier counterparts.
The finished crayons along with my original sketch.

You know I'm all about the applique. It was my Numero Uno fave way to reinvent an outfit until I discovered felting. Like I always tell ya, your machine can do this: set it to the zigzag setting, set the the zigs wide (I have a computerized sewing screen and I use the number 6) and the spacing close (I set my spacing at .5 which creates a solid line of zigs). This is the same method I used for my Pencil Skirt, my Rock Star Apron and, most recently, my Fulla Hot Air Dress.
Once the crayons were appliqued to the skirt, the felting began. If you are an art teacher then you know the study of lines is muy importante. I decided to have each crayon scrawl a different line onto my skirt. I think this will be fun to wear at the beginning of my line lessons. If you look closely, you'll see I drew the lines onto the skirt with white chalk.
I decided to only have lines at the bottom of the skirt on the backside. Cuz all ya'll know horizontal lines across the toshie woulda just been bad.
What do you wear with a crayon skirt? Why crayon shoes, of course!
AND there you have it. When I stepped out of my bathroom in this look the other day, hubs took two steps back and grabbed the door frame. I mistook this for a "whoa, mama" move. 

Me: Well! What do you think?
 El Hubbo: Is this what you've been working on?
Me: Yeah! What. Do. You. THINK?!
Hubs: Um. I don't think I like it.
Me: WHAT?! Look at this outfit, it's amazing! Why don't you like it?
Hubs: It looks like a costume.

Which is precisely what it is. The Crazy Art Teacher Costume. All yours for five easy payments of $19.95. Shipping and handling not included.


Sunday, February 17, 2013

What the Art Teacher Wore #55

Lovely Monday: In keeping with last week's WIW promise, I decided to go all Valentines-y again this week. Hubs and I hit a Goodwill in Jackson, Tennessee recently and I snagged this entire outfit there. I've been hitting the thrifting jackpot of late which is good because I practically have nothing to wear (yeah, that was some serious sarcasm. This here cloths horse could outfit an army or two. Given they're okay with wearing dresses and fishnets). dress: Talbots, thrifted; sweater: Express, thrifted; sparkly fishnets: TJMaxx; butterfly brooch: vintage; belt: Pin Up Girl Clothing; shoes: Fluevog; necklace: ancient, Target probably
 Greetings, lovelies! I do hope Valentines Day treated you nicely. I decided to get my sweetheart a box of Krispie Kremes fresh off the convertor belt while I received an assortment of trashy mags and dark chocolate bars. So I guess you know what I've been up to this weekend.

When not catching up on the lives of the Kardashians (dude, how do people so utterly lame become famous? Ah, yes, because equally utterly lame people like myself keep reading about them), I did do some research on an upcoming self-portrait project for my first grade artists. Since we are learning about the United Kingdom, I've decided they are going to portray themselves as royalty, complete with the Crown Jewels. Not to be confused with "family jewels" or "Royal Crown" which will find you in a google-y place you might not want to be.

So I share with you just a bit about the Crown Jewels and I bid you a royal week. Ta-tah!
The Queen holds the Orb and Sceptre used at her Coronation, 2 June 1953. Doesn't she look divine? And so...young! I love how her wide-eyes read "holy cray, I'm queen!" yet her firm lips say " and ya'll better recognize." They do say "ya'll" in the UK, right? So the Crown Jewels are treasures (like those shown above) used in ceremonies. They've been collected by English kings and queens since 1660.
Ketchup and Mustard Tuesday: Because that's what this outfit reminds me of. Both my second and fourth graders are currently weaving. Once they (finally) get the hang of it, I enjoy reading a chapter book to them. This keeps them focused on what they are doing and allows me to introduce the United Kingdom through fun fiction. I'm currently reading Dodsworth in London to the littles and Mary Poppins to the biggins. dress: vintage, Amsterdam; belt, sweater, boots: Anthro; flower brooch: vintage, thrifted; tights and hair clip: Target
The British Imperial State Crown. Okay, growing up in the 80's, all I know about the imperial crown is what I learned from those Imperial Butter commercials. Turns out there's a little more to the crown than that. This solid gold crown is covered in 3000 precious stones including diamonds, rubies and sapphires (you know, what you got on Valentines Day). A couple of the jewels on the crown were worn by royalty centuries ago. In fact, the oldest gem was worn by Edward the Confessor in 1042.
A Gnomey Valentine: I attended a meeting at school this particular morning and a parent, looking me up and down, said, "You know, you were made to teach art." Now this could either mean I look like a crazy person or an artsy one. I'm not kidding myself, I'm going with crazy. gnome dress: made by me; tights: Target; shoes: Miss L Fire; sweater: Ann Taylor, thrifted
When not worn, the Crown Jewels are kept on display in the Tower of London.
Oh, look, it's a Yeomen Warder of Her Majesty’s Royal Palace and Fortress the Tower of London, and Member of the Sovereign's Body Guard of the Yeoman Guard Extraordinary. Yeah, how 'bout we just call 'em Beefeaters, 'kay? These dapperly dressed dudes are the supposed guardians of the Tower of London but mostly they act as tour guides and attractions themselves. Why call 'em beefeaters? It seems they used to receive beef as a part of their wages. 
Happy Valentine's Day! Thursday: Oh the joys of teaching children jacked up on sugar. It was most def one of those "if you can't beat them (literally), join 'em." When you are as high on sugar as they are, it makes for a really fun time. Not. dress and sweater: DIY here; tights: Target; shoes: Fluevog; belt: Pin Up Girl Clothing
The Crown Jewels are the following objects: the crowns, sceptres (the long wand-like thing with either the cross or the dove on the end), orbs (that gold sphere with the cross on the top used to signify authority), swords, rings, spurs (think cowboy), colobium sindonis (this plain tunic worn to symbolize a shedding of vanity...worn under some pretty fab robes, of course), dalmatic (an even bigger plain tunic), armills (a bracelet), and the royal robe.
Freaky Face/Wrinkly Dress Friday: Yeah, it was one of those days. dress and belt: Supayana on etsy; tights: Target; shoes: Miss L Fire
Speaking of jewels, remember that thrift-score run I bragged about earlier? Well, lookie what I found this past weekend in Lewisburg, Tennessee? Holy moly, can you believe these finds!? I am so excited to welcome these crown jewels to my royal family of beaded cardis...
I betcha the Queen of England ain't got nothin like this in the Tower of London. Poor thing.
 Until we chat again, enjoy your week!


Wednesday, February 13, 2013

In the Art Room: Chillin' wit my Gnomies

When writing about her gnomette, this sweet third grade artist said one of her hobbies was taking care of her pets when not working at the animal shelter. So sweet compared to the axe-wielding, sneaky-eyed gnome shown a little later in this post...

 Greetings from Gnomeville! Please feel free to pull up a mushroom, make yourself a tiny gnome-sized cup of tea and stay awhile. I've got many a gnome-tastic masterpiece to share with you, so make yourself at gnome, er home.
Despite the awkward placement of the fishing pole, I do love this sneaky-faced fisherman.
 You might remember we began our study of Germany and garden gnomes ages ago. I shared a very brief gnome history here and even whipped up a gnome dress for the occasion. Since then, the art room has become over run with these little dudes and I almost can't stand to be alone in the same room with all of them. They are Always Watching.
My collection of gnome books. The one in the foreground proved to be the most kid friendly. While I love Gnomeland, mooning and chest baring gnomes are just the kind of thing that principal lady of mine frowns upon. The kids were fascinated by How to Survive a Garden Gnome Attack. It's important to be prepared.
 Wanna make your own gnome-tastic landscape? Here's how we did it:
  •  We started with a 12" X 18" piece of white paper. After a big fat hairy lesson on color mixing, we painted layers of color for our sky. This took us two thirty minute sessions.
  • The next week, we had a chat about Germany's Black Forrest. We learned that it got it's name from the Romans who called it such because the dense coverage of the trees makes the forest very dark. We talked about the textures of the forest while passing around objects from the photo above: wool, turkey feathers, pine needles and a brillo pad to recall how moss might feel.
  •  After that touchy-feely session, we discussed implied texture and how to create them. We spent one class using sponges or brushes to create clouds in our sky. The following class, we sponge painted green papers to imply the texture of moss. Lastly, we painted texture of tree bark on brown papers.
This is actually a grouping of first grade landscapes. They went about their sky differently by simply picking a sky color and adding clouds. They had already studying sky painting here. I'm sharing their work so you can see how the third graders also created their landscape.

  •  To assemble our landscapes, we tore our green painted papers and glued them down. In order to "plant" the trees, I asked the students to only add glue to the straight edge of the ground, not the torn one. This made it so we could tuck trees and mushrooms into the land later.
  • Another tearing sessions resulted in our trees and branches. The kids tired of the branch making business pretty early as you might be able to tell. The end result looks like some serious pruning happened in the Black Forest. Oh well.
 Disco Gnome complete with a ginger afro, funky glasses and a disco ball. The little Sweet and Sassy Gnome on the right is holding a Valentine's heart that reads "kiss me".
  •  When the landscape collage portion was complete, we set those aside for many a day to craft our gnomes. I am on a toilet paper tube project kick (see our hot air balloons here) and that's what came in so hand for the gnome bodies. Most of the kids painted them so that one color was on the top and a different one on the bottom.
  • While those dried, we began drawing the faces of our gnomes. We did our usual: draw with a pencil, trace with a sharpie, erase peek-a-boo pencil lines and add color, baby, color (don't ask me why, but I always say, "color, baby, color" like I'm Tom Jones or something). Those were cut out and glued to our tubes along with arms, shoes, hands and props.
Not sure if this is a gnomette or a princess waiting for her carriage in the distance. I do know that this artist started quite the trend among the gnomettes by requesting a "fluffy skirt" skirt (gee, I wonder where she got that idea?). My stash of coffee filters came in pretty handy. P.S., how cute is that fan?!
  • Once the gnomes were complete, the kids cut the tube up the back. Then they folded a small ledge on either side of the tube. This gave the tube a flat surface to better attach to the paper.
Okay, I'm in love with this gnome. Not only is he affectionate ("Kiss the Cook" apron, seriously?) but he's also rather handy in the baked goods department. Cookies and 1$ pies? Don't mind if I do.
  • Once the gnomes were attached to their landscapes, the kids continued to enhance their scene. Some kids requested to create another gnome from a tube, three boys decided they need tube-cars and, as you can see above, one tube was used as a pie stand. I have a very hard time saying "no" to the kids when they run their genius ideas past me. How can I deny their enthusiasm and creativity? This explains why our projects take for-evah.
The artist who created the work on the left requested a handle for his ax. We used a toothpick. And check out that fishing gnome. This artist even included a reel in the gnomes right hand.

Oh, look, it's Gnomeland's Got Talent. I'm not sure what happened to her back up singers but I'm totally diggin' the tip jar and the boom box. She's ole skool.
This work was created by the artist who affectionately refers to herself as Mini-Mrs. Stephens. She really wanted her gnome to look like the one I had on display. I'd say she did an excellent job. I especially like her addition of the fuzzy slippers.
Can you tell what this gnome is doing? He's leaf-blowing! What my photo didn't capture was the large leaf-blower he's wearing on his back. I love the wind blown leaves.
I have to tell you, I think this might be one of my favorite projects so far this year. The kids just went wild with ideas for their gnomes and they seemed to enjoy every minute. I do hope you've enjoyed your stay chillin' wit my gnomies. Until next time, as the gnome above would say, "Peace out, dudes!"


Monday, February 11, 2013

DIY: A Poodle-tastic Valentines Dress

Dude, that hair! The other day, I was having a "serious talk" with a student when I noticed her eyes kept wandering up, up and up to the top of my head. It's no small wonder these kids can focus on anything besides that giant 'do. (And by " 'do" I mean hairdo, not something I recommend you "do". Unless you are so inclined to backcombing and hair-hosing, er, spraying).
Well, Happy Almost-Valentine's Day to you! You got some big lovely-dovely plans in your future? Aw, ain't that sweet (gag). Me? Oh, you know, hubs and I will prob just do our usual: enjoy some delish Greek take-out, open cat-themed Valentines cards we both barely remembered to grab at the Walgreens on the corner and snuggle up next to the space heater to catch an episode of Dual Survival (does anyone else miss Dave besides us?) on our craptop. I know. Super sappy gaggy stuff. Don't hate.
I'm stoked to wear this dress on Thursday even if the kids won't be thrilled. Every dress I've created since that light-up number has been received with an, "Eh, that's neat. But does it do anything?" I'm thinking I might need one of those squirt-you-in-the-eye roses as a brooch. Too mean?
 But enough about my romance life, let's chat about this here dress. It was created on a miraculous gift sent straight from Teacher Heaven: A Snow Day. Or, as I decided to dub it, A Sew Day. When I heard the news that morning, I hopped right up and decided to make the most of it. The pieces of this dress had already been cut and I was so thrilled I had a day to put it together.

Yeah, yeah, I know I said I'd try out some new dress patterns this New Year but I just felt this fabric was meant to be this dress pattern. The fabric is from Alexander Henry, one of my fave fabric design companies. So much retro-y cuteness!

I felt pretty self-assured when starting the dress since I've made a Cuckoo Clock Frock, a Gnome-y Dress and that aforementioned light-up number from the same pattern. So I was a little annoyingly surprised when I struggled with the V at the neckline and the fit and finish around the bust line and waist. I did get mighty distracted catching up on episodes of Project Runway (there's a fellow Nashvillian in this season's lineup!) and a mid-day bubble bath (don't judge) so maybe that was part of the problem.
 Creepy Doubles Photo. Sorry, but am I the only one that finds side-by-sides creepy? Then why do it? Cuz I am creepy, yo! By the way, the photo on the right is how I'll most likely be wearing my V-Day dress. This sweater is a DIY from ages ago that gets little air time. I think it suits this dress nicely.

I think part of my struggle is: I DON'T REALLY KNOW HOW TO SEW. There, I said it. Whew! It's finally off my chest. And don't you go leavin' a comment saying otherwise because that's just like tellin' a buck-toothed, too-skinny, four-eyed girl she should model (here). I've known that I've been fakin' and fudgin' it for a while and when this dress just didn't come together as it should, I knew it to be true.
 Awkward Hands Photo.

However, that doesn't mean I'm going to give up. Oh no. I'm determined to get better. But this dress helped me realized that just going down the same sewing path over and over was not going to improve my sewing skills. I've got to learn how to sew the right way. Awkward hands and all.
 Hands in Awkward Place Photo. Really? I mean what pattern drafter decided that the pockets should be right there. Kinda awkward, right?

So I'm giving myself a sewing course. No, I'm not taking some local class, I'm gonna start by reading one of the many sewing books I've purchased over the years. In fact, I began reading Gertie's Book for Better Sewing this weekend and I've already learned so much...and come to realize how little I know. In fact, this book may be a little bit too advanced for me, but I'm goin' it anyway. I'll keep you posted.
In the meantime, I'm still wearing this dress regardless of my flubs. I'd show you a photo of the backside but that's where my problems seem to show the most (in more ways than one)...and I already shared one embarrassing photo within the last 24 hours, I don't think I'm ready for more.
Outfit details: hair clips: DIY here; dress: moi, of course!; belt: Pin Up Girl Clothing; red tights: Target; sparkly fishnets: TJMaxx; leopard print heels: Goodwill
All that blabbering aside, I do hope you have a lovely Valentine's Day! I know it'll be nothing as divine as my Greek Food/Cat Card/Space Heater/Survival Show affair, but what can you do? Not everyone can live la vida loca.

Until next time, xox!