Hey, friends! I thought I'd share with you a fun clay project that you can do with either kiln fire or air dry clay: Clay Tacos! I did this project with my kindergarten kiddos and it was a huge hit. It also taught them a ton: clay can capture texture; how to create a sphere, coil and a slab, the holy trinity of clay sculpture; how to adhere clay with an alternative slip and score method. So here you go: Clay Tacos!
One thing I love when working with clay and kiddos is introducing them to texture and clay. We step on the clay, pound it into textures, you name it, we try it. My favorite thing is to have a variety of lace, doilies and burlap for them to experiment with.
With a class of 20 kids pounding clay flat, it is going to sound like a crazy roll of thunder (with echoes of lots of laughs from the kids) but I have found it to be the quickest and easiest way to introduce the kids to creating a slab.
With a beautiful textured piece of clay, the possibilities are endless! In fact, I'll be sharing EIGHT of my favorite air dry clay projects using this method and more at the Art Ed NOW conference!
Have y'all signed up? You really should, it's a ton of fun.
I explored EVERY air dry clay on the market (seriously) when working on my clay book which is now available for sale here! Many of the air dry clays have the look and feel of kiln fire so it's a great way to introduce kids to the magic of clay even if you are kiln-less. So get you some clay and make you a clay taco today!
If you have a kiln, then you probably have glaze...and you are more than likely well aware of how freakishly expensive glaze is. I swear, it eats about a quarter of my budget. But I just can't give the stuff up: glaze really does give my students the ultimate ceramic experience. So today, I thought I'd share my very favorite glaze brand as well as how I distribute glaze and conserve it...so that I don't waste a single precious (read: pricey!) drop. Here you go:
My dog dishes, ice cube trays and just about everything else were purchased at the Dollar Tree. I love the Dollar Tree, y'all. If I could marry it, I totally would. Cassie Lane Dollar Tree. Has a nice ring to it, no?
Once our glazing days were done, I tossed the press and seal I was using to keep the glaze fresh and let them dry out. Just a crack of the tray works to pop them out. Then put them in the glaze bottles, add water and shake. Clean trays + conserved glaze = happy art teacher!
This is a messy task...and one that you will only want to do once. So get all your glaze bottles and trays out and knock it out in one fell swoop.
You'll be happy you did. Clean (ish) glaze/ice cube trays and fresh glaze for the win, kids!
Here's a way to introduce your kiddos to clay even if you don't have a kiln: Salt Dough Clay! Last summer, when I was writing my book Clay Lab for Kids, I had to come up with kid-friendly clay recipes. You see, the book is divided into three parts: projects created with air dry clays available at craft stores; polymer clay projects and clay projects created with homemade clays. There are several clay recipes in my book (including an edible clay!) and this salt dough clay is one of my favorites. Here's how to make it and create a Salt Dough Sunflower (a project not found in my book, just for you!):
Here's the recipe which would be enough clay to create a half dozen flowers: (Allergy warning! If you are allergic to gluten, this is not the project for you.) * 2 cups all-purpose flour * 1/2 cup salt * 3/4 cup water Mix all of the ingredients together in a bowl. Dump out ingredients onto wax paper or plastic and continue to knead until a soft dough forms. When creating, be sure to work on a plastic covered surface as this stuff is sticky! Also, when making this flower, use a styrofoam bowl or a bowl covered in plastic wrap so that the flower pops out easily when dry.
Also, any clay not used, simply wrap in plastic wrap and store in the refrigerator for later use.
I placed my flower in front of a fan to dry overnight. Just so you know: this is a dough so it will rise a bit! Don't be surprised if your flower looks a little fluffy once dry. Salt dough can also be cured by baking in the oven at 200. Keep an eye on it as the goal is simply to dry it out, not burn it. I have cooked mine for 15-30 minutes depending on the dampness of the clay. I painted my flower with acrylic paint but tempra could also be used. Be sure to cover with a coat of ModPodge to insure that it will not break.
If you don't subscribe already, I update my YouTube channel with videos like this and all things art teachery pretty frequently. You are always welcome to use my videos and lessons...I just always appreciate a shout out. In other news, I'll be presenting at Art Ed NOW on August 3rd on...you guessed it, all things clay! I'll be sharing a TON of no-kiln clay projects for the elementary and middle school set. And if you've picked up my clay book and you have a spare moment, a review here would be so very much appreciated. Thank you so much, y'all!
Today was my last day of school for the year...and it totally didn't feel like it. The weather is wet and cold and I still have packing up aplenty to do. Not to mention, I have new ideas for the next school year that I'm excited to start plotting and planning. However, there is a high percentage that I will end up spending my days in my sewing room and totally neglecting that last thing. I mean, really, who am I even kidding? I know that many of y'all are still in the throes of art teacherin' land and for that reason, I thought this episode of Art Teacherin' 101 could feature my fave things to do with the kiddos at the end of the school year. Weaving, origami, drawing, blocks, dry erase boards, draw-alongs with this channel are just a few of my favorite engaging end of the school year activities. In the past, I've had my older kids do surveys of their fave projects and fave aspects of my class. That was always fun to read and enlightening. We also drew portraits of our classroom teacher and wrote about them which was given to them as a sweet gift from their class. There are really so many ways to keep the kids active and engaged...I'd love to hear your ideas! Until then, you'll find me sleeping in, sewing up a storm and spending time with the hubs, our cat and my sweet friends.
I recently shared with y'all the 3-Dimensional portion of our art show...today I thought I'd showcase the 2-Dimensional side. But before I have to do that, I must give a HUGE virtual high five and hug to Molly, Donna, Lori, Terri, Paula, Camilla and the rest of the crew for hanging EVERYTHING that you see in these photos. Without moms like these, there would not be an art show. For them, my young artists and I are forever thankful! Now, let's take a tour of the show!
Almost every project you see here and in the video can be found on my blog our my YouTube channel. Feel free to use in your art teacherin' world. A shout out is always appreciated. In this blog post, I thought I'd also answer some frequently asked art show questions:
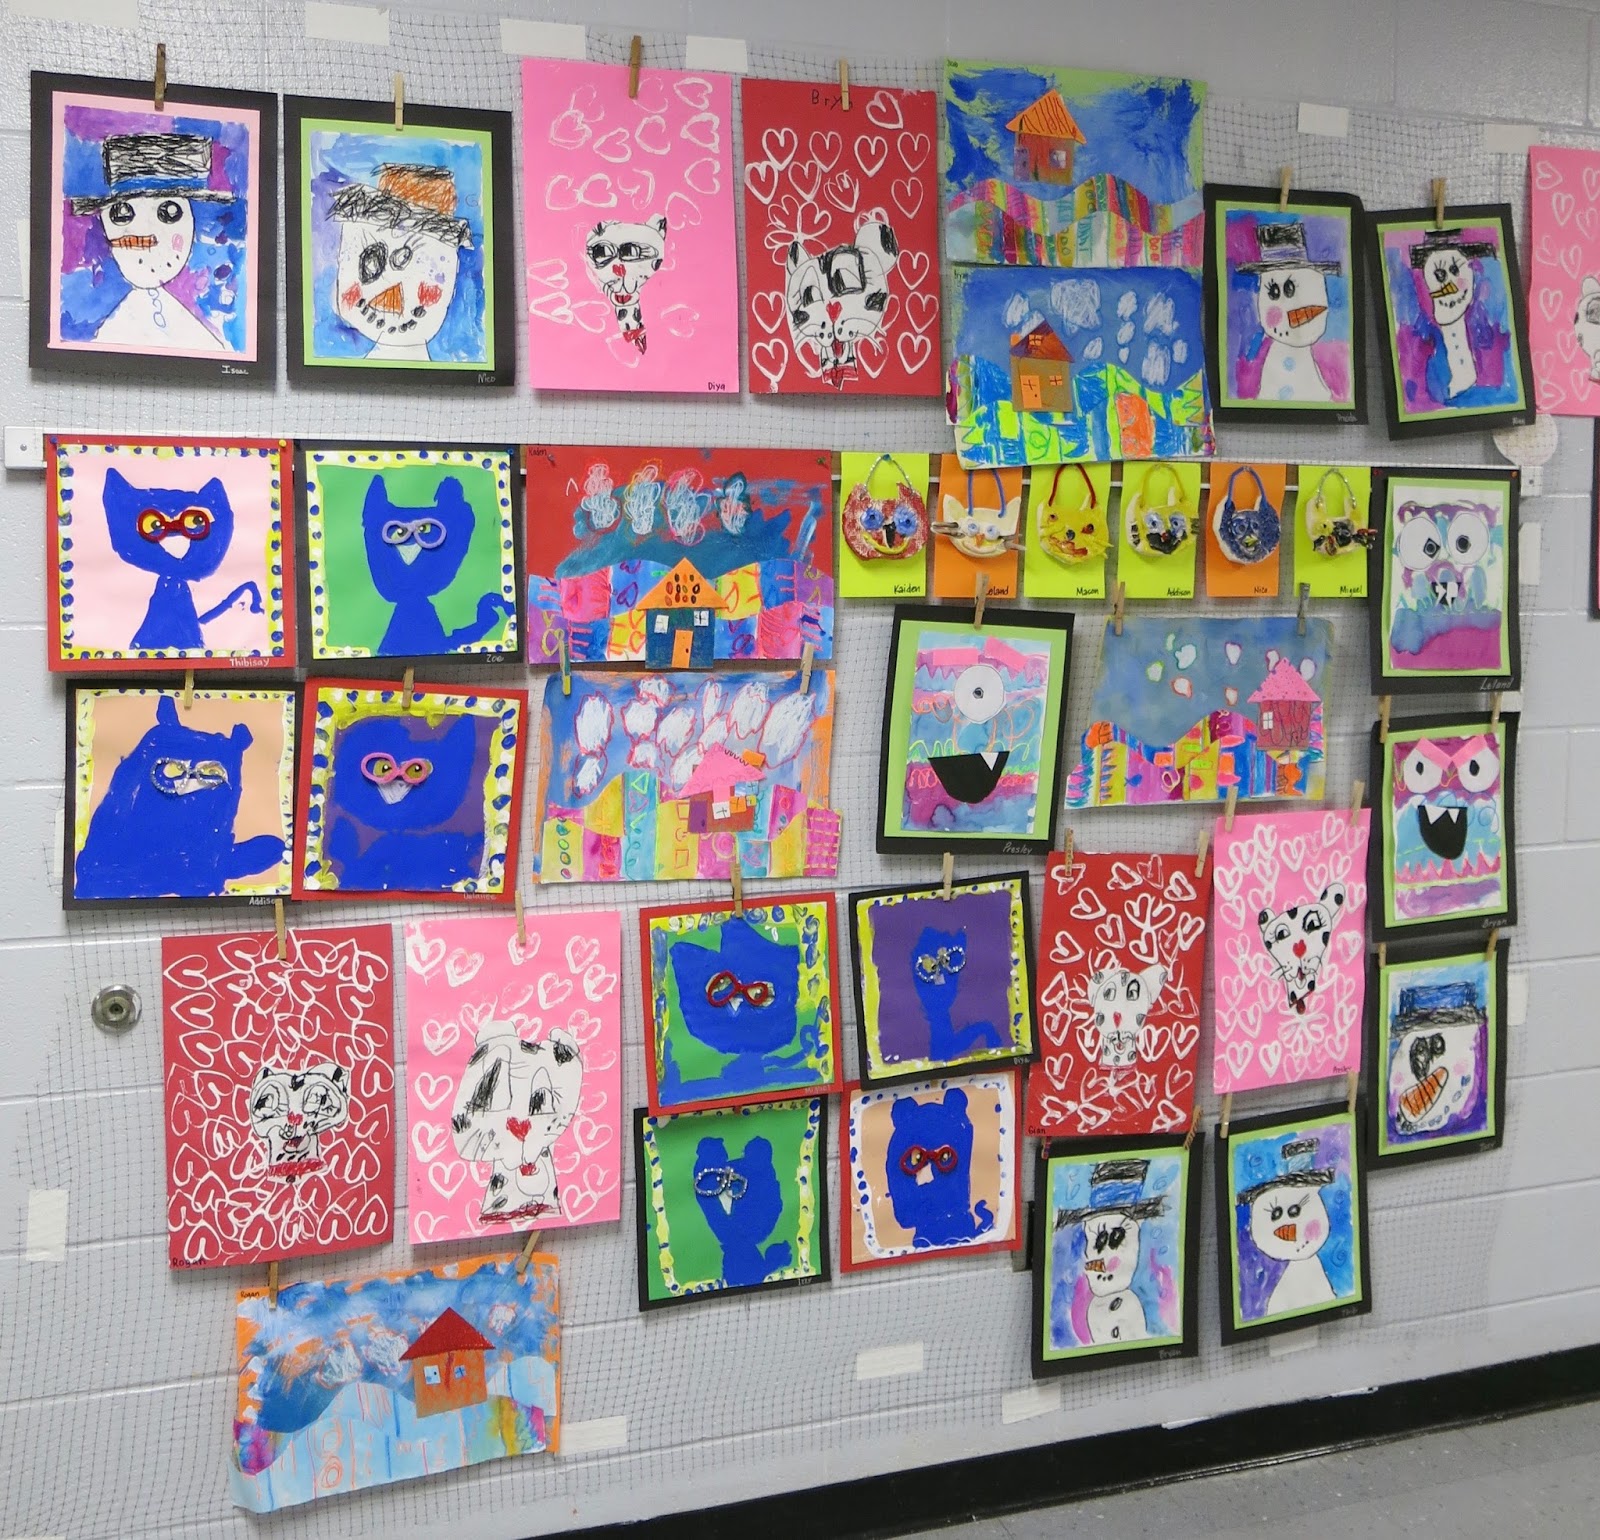
Kindergarten displays. I love how fun and funny their artwork is. It always makes me smile to see what they create. All these projects can be found right here on my blog. Just use the search bar.
Do you hang everything that the kids have created all year? Yes. Everything. My room is very big (it used to be the school library) so storage is not an issue...staying organized, however, is. It's just not my nature to be a Lady of Organization. And I'm cool with that...but it is a pain when it's art show preppin' time! "Where did I put Mrs. So-in-So's classes art?!" Yeah. That may happen multiple times during art show season.
Kindergarten selfies and line monsters.
How is your artwork hung? We struggled for YEARS finding something that works. We use deer mesh adhered to the wall with 3M's Gaffer's Tape. About three weeks prior to the art show, the moms begin hanging the mesh which we purchase off Amazon. We try to leave it up from one year to the next but sometimes it gets damaged. The teachers use it throughout the year to display the kids' work. Here's a little more about that:
We've used this method for the last three years and there is no going back, we love it! And the artwork actually stays up...which, if you are in a building with cinder blocks, you know that is no easy feat.
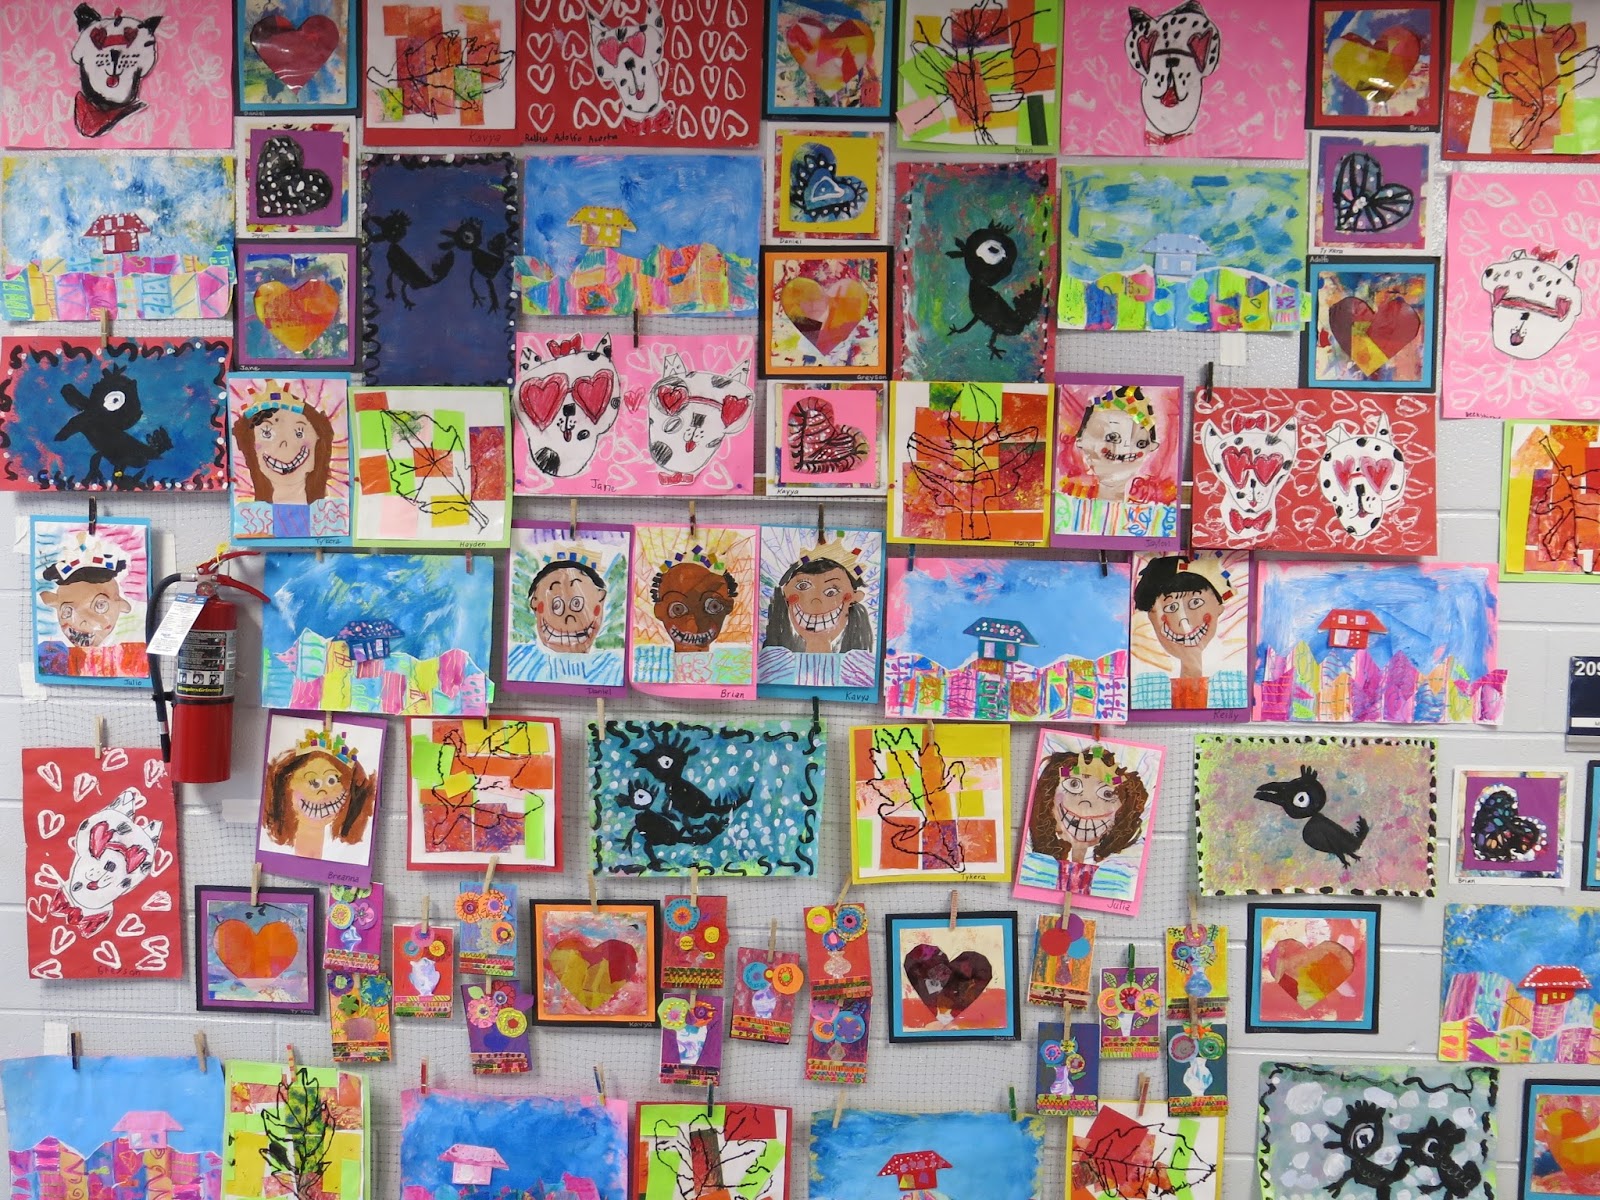
With this much art, we have to display it "salon style" with art from floor to ceiling!
How do you get volunteers? The moms I have are AMAZING! In fact, my mom-in-charge this year doesn't even have a child at my school anymore! She's just so stinkin' incredible and good at what she does, she came back for more. Honestly, just reaching out to the room moms and requesting that they contact other parents is the best way if you've never used volunteers before. My mom helpers came in nearly every day for three weeks solid to make this magic happen. Not only did they hang artwork but they also framed, matted and did the thousand other small tasks that goes into the making of an art show this big.
First grade work...the Bebo birds are a fave of mine.
Is your art show a fundraiser? I did two art shows this year. In the winter, I used Artome which is a fundraiser and I LOVED that experience as it was super simple and raised a good amount for our art program. Our spring show is not usually a fundraiser although we have taken donations for the local animal and homeless shelters before, one time raising $1200!
The first grade had so much work! They flew through their projects this year.
My mom helpers were ninjas at hanging artwork in hard-to-hang places, y'all.
How do you get people to come to your art show? The art show at my school was established before I got there. It's a tradition at my school...one that I try to make bigger and better every year. Not only is it an art show, but it is also an ice cream social with free ice cream served up by our fourth graders in the school cafeteria. Often times we'll also have a book fair on the same night to bring in even more folks. We always have a huge turnout.
Second grade created some of my favorite pieces this year. I am loving the weavings, the hearts and the rainbow books!
How do you manage your time to get everything done? I'm the worst time manager, y'all. Knowing this, I try to start early. After winter break, I try to get myself into art show mode by sticking around after school, framing pieces and gathering up my thoughts on what our theme will be. After spring break, we dive in to clay with that theme. Once clay is complete in March, April becomes the crunch month for the show.
Why do you hang up everything from everyone? We do a couple of other art shows in the community that showcases a handful of kiddos. This is a great self-esteem booster...for that small amount of kids. I always worry about the other kids who don't have artwork featured. I was never a kid who got picked for such things...and it always left me with a sour taste in my mouth. I carry that with me as an adult. I never want a child to feel like their creative work is not good enough. I want to celebrate all of the kids and all of their efforts...which is why I do my art shows like this. It's an INSANE amount of work. I'm not even gonna lie: I work on Sundays and put in many 12 hour days. But, in the end, it's so worth it.
I love having displays in this big bank of windows!
Do you repeat your projects or do new ones each year? Honestly, I like a challenge and I like change. I may repeat a process, like the marker prints for those floating leaves you see below, but I rarely repeat a project completely. You learn something each time you teach a lesson...what worked, what didn't, what can be improved upon, added or taken away. I also love learning new ideas and methods from other art teachers and I get excited to share them with my students. So, no. I don't usually repeat projects which means much more work for me but it does keep things interesting and the art shows every changing.
Who takes the artwork down? So parents hang it up right outside the classroom teacher's doors. I do that so the kids can easily find their work. This also makes taken the art down a lot easier. A few days after the art show, the teachers take down the artwork during our field day and various other activity days that seem to fill the end of the school year.
How do you insure the artwork gets home safely? The fabulous assistants at my school create a paper portfolios for each child in our school. They start right after spring break and fold large sheets of bulletin board paper in half and staple the edge. Many teachers have the kids decorate their portfolios while they take their work down. I love how dedicated the teachers and assistants are to making sure the kids' work gets home safely.
I tried several new techniques with my third graders this year and they really rocked it.
String art was something I'd only done with my fourth graders previously. This year, I did it with third grade and they loved it.
Don't the kids get upset that they have to wait all year to take their artwork home? Because we've always done end of the year art shows, the kids know that they have to wait to take their work home. One thing the kids are always excited to take home are their clay projects. That's why I wait until after spring to do those projects: so the kids won't have to wait as long to take them home! It also makes storing those bigger pieces a lot easier knowing that I only have to find a place for them for about a month...not longer.
Seeing these fourth grade works of art makes me sad...I'm miss these artists!
At the end of the school year, even though my kids have worked all year, I only have a handful of works of art from them. Why is that?! I have found this to definitely be the case with my third and fourth grade artists. The answer is easy: they do projects that are more detailed and time consuming! You are teaching them so many techniques in one project...it can take a while. Also, my fourth graders had three 3-D pieces on display this year: sewn and stuffed monsters, plaster candy hearts and clay bobble heads. All of those took many weeks to complete leaving us with less time for 2-D works of art. It's okay! As long as your artists are creating and having fun, you are on the right track.
I hope you enjoyed the art show! Another one in the books. Love to hear about your art shows in the comments, y'all.
Yesterday was a really fun and exciting day: I was on News Channel 5's midday show Talk of the Town! You can catch my four minute segment here. I was featured on the show to chat about my book which is now available for purchase. I had such a great time that I thought I'd share the experience with you.
Talk of the Town is a midday show that airs each day of the week and features authors, artists, chefs, gardeners (you name it!) who happen to be local. I received an email from the host Meryl Rose not too long ago (via the marketing director of my book) asking if I'd be up for a segment. Of course I happily agreed! During the summer, Talk of the Town is a fave midday show of mine.
I was asked to go on the show the day after the art show. I have been so busy with this mural and the art show (big ole blog post to come!) that I readily agreed to be on the show...and then promptly put it out of my mind. I had too many other items on my plate to take care of first! But on Tuesday evening, when the art show was over, I had to start wrapping my brain around being on the telly the following day.
I gathered up my examples, a couple copies of my book, a project for us to make on air and my buddy Tamara and arrived about an hour before going live. The news station is in downtown Nashville which is always an adventure to drive around (ahem). With the big Nashville growth boom, there is construction EVERYWHERE and parking NO WHERE. I'm so glad I had Tamara with me as I woulda been in panic attack mode.
When we arrived to the very unassuming building, we were so surprised to walk in to this. It was amazing! So big, quiet and magical. I was also surprised how few folks were working. There were the hosts of the show, the guests (I was on with a chef and a florist) and two camera guys. The cameras now operate by computer and move around on their own. So there just isn't a need for a room full of camera folks.
When I arrived, I unpacked my projects. A table on wheels was waiting for me to prepare. The hosts were so super nice. Meryl was to interview me. She spent a lot of time chatting with me and getting to know me so that our conversation would flow on television.
We did run into one small hiccup though. My clay demonstration called for me to step on the clay. Because of the way the cameras were set up, I was not able to place the clay on the floor and step on it. Instead I was to do it on the table. Meryl went in search of a pair of shoes but didn't come up with one that would work. It was then decided that I would go LIVE barefoot so that I could use my shoes for the demo. That's right! I was barefoot during my segment. You can take the hillbilly art teacher outta the art room but...well, you know the rest.
The show is a half hour long and my segment was the first of three. With only four minutes to talk, Meryl mentioned that we might not have time to get to the turtle demonstration. I was determined we would squeeze everything in. I mean, I teach 30 minute art classes, I can talk fast when I need to.
I cannot say enough about what a wonderful experience it was being on the show. Everyone was so sweet, kind and made me feel completely at ease. Thank you to the crew at Talk of the Town for a fun experience!
So one day before the art show, we managed to pull together and pull off one of our biggest collaboratives to date: our Legacy Mosaic Mural!
This big honkin' mama-jama was created by my first thru third grade students. I knew that my kindergarten and fourths would need two weeks for their clay projects...and that my other kiddos would only need one. But when we work with clay, we ALL work with clay so I knew I'd need a project for that group which would carry us thru the second week. And that's when I got the idea for this big ole project. Here's the video I created months ago for the kids. Feel free to use in your art teacherin' world!
I'm a big fan of the artist and illustrator Galia Bernstein and this project was inspired both by her and by the book Who is the Beast? by Keith Baker.
I know you can totally see the influence, can't you? I've always loved this book. When I came to my school so many years ago, I loved that a tiger was the mascot. It meant I could share this book even more with the kids!
So, who did we do it? Lemme tell ya.
First grade made the flowers, second grade made the butterflies and third grade made the birds. Everyone who finished their small piece then created a leaf or two. Before each piece was placed in the kiln, I placed the alphabet noodles of the kid's initials into the clay. These noodles burned off in the kiln and left behind the impression of the initials.
Once each piece was out of the kiln, I created a diluted black glaze. Then I dunked just the surface of each piece in the glaze and then gave them a quick wipe on a damp sponge. This part was time-consuming (the entire thing was, honestly). But I just sat one day after school and dunked, swiped, dunked swiped until they were complete.
These pieces were then returned to the students where they were tasked with glazing just the raised surface. I did limit the palette so that it wouldn't be too much of a sea of color. Flowers were yellow, pink and red, birds were blues, butterflies were purple, orange and yellow. Leaves were a variety of green.
After these were fired the second time, the workload was on me. I had acquired this huge frame last year and I'd been dreaming of a mosaic project since. I measured the inside of the frame which is 3' X 4'. I went to the local hardware store where they cut me a piece to size. I also picked up a jumbo bottle of Gorilla Glue and high gloss paint. My P.E. teacher buddy painted the board for me. From there my custodian friend glued and drilled the board into the frame.
I created the tiger. This literally took me 45 minutes to draw out, cut and texture-ize. With the art show looming, I was short on time which meant I was in hustle mode. That dried a matter of days. This past Sunday, I came in, laid out and glued each piece, glazed and fired the tiger.
In other news, does anyone know how to get Gorilla Glue off of skin? I've had it on my hands FOR DAYS now!
The tiger came out of the kiln this morning and was glued into place. This massive masterpiece will not be grouted. Before hanging it, it weighed in at 70 lbs. Grout would have only made it heavier.
There were small empty spaces that were driving me nuts. I remembered I had a stash of decorative marbles and glued them in place. I LOVE them as they add a bit of sparkle to the piece.
Stroke and Coat by Mayco is the best, y'all!
This afternoon, my custodian friends worked tirelessly to get this beast up on the wall. It's drilled into the wall as well as supported by both a hanger and a beam underneath.
And the pieces are rock solid with that glue.
With the art show tomorrow, I'm so excited that we were able to pull this one off! It is my favorite collaborative to date!
Because we do so many collaboratives, my students rarely are upset if they don't get to "take it home". I emphasize that this is their beautiful mark they are leaving behind...and for real, look how beautiful it is! I'm so happy with my sweet artists and this beast of a creation. Love to hear of any mosaics y'all have done like this!